3.5 KiB
Build on Mac
Install Xcode
You should install Xcode as the step 0.
Install CMake
Download the .dmg from here. Just double click and follow the instructions.
Install Boost
Download the .tar.bz2 or .tar.gz from here.
Unpack and go into the directory (suppose Boost version is 1.74):
tar -xzf boost_1_74_0.tar.bz2
cd boost_1_74_0
Run bootstrap.sh to generate b2:
./bootstrap.sh
You can change install prefix with --prefix option (default is /usr/local, need sudo), but I don't recommend.
Build and install:
sudo ./b2 --with-system --with-date_time --with-filesystem variant=debug link=static threading=multi -j4 install
Notes:
- Only build the specified libraries.
Asioitself is header only so doesn’t have to be built. Only build static libraries (link=static) - The number after
-jdepends on the number of CPU cores you have. - If you want to build release version libraries, set
variant=release. Thedebugandreleaselibraries have exactly the same name, so you cannot build them both at the same time. - Don’t forget the
sudosince the install prefix is/usr/local.
To clean the build, run b2 with target "clean":
./b2 clean
The libraries are installed to /usr/local/lib. E.g.,
$ ls -l /usr/local/lib/libboost*
-rw-r--r--  1 adam  admin   540288 Apr 21 11:01 /usr/local/lib/libboost_date_time.a
-rw-r--r--  1 root  admin     2976 Apr 21 11:01 /usr/local/lib/libboost_system.a
...
The headers are installed to /usr/local/include/boost.
IMPORTANT
Remove the following directory otherwise CMake couldn’t find Boost.
sudo rm -r /usr/local/lib/cmake
This directory was installed by b2. I can’t see why it’s necessary.
Install OpenSSL
Install with Homebrew (the usage of Homebrew itself is out of the scope, please Google and learn it by yourself):
brew install openssl
Please note that it will be installed to /usr/local/opt/openssl instead of /usr/local.
Install Zlib
Zlib should have already been provided by the system (/usr/lib/libz.dylib). If not, try to install with Homebrew.
Build Webcc
Open CMake, set Where is the source code to Webcc root directory (e.g., /Users/adam/github/webcc), set Where to build the binaries to any directory (e.g., /Users/adam/github/webcc_build).
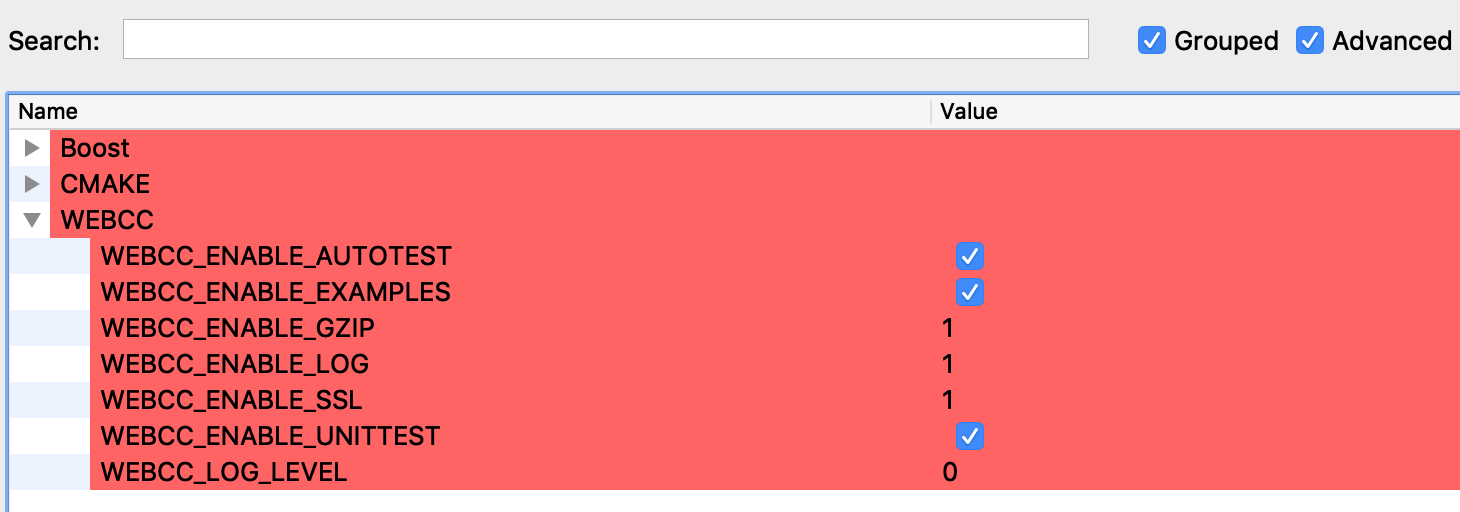
Check Grouped and Advanced two check boxes.
Click Configure button. Select "Unix Makefiles" (or "Xcode") as the generator in the popup dialog.
In the center of CMake, you can see a lot of configure options which are grouped and might also be highlighted in RED.

Now change the options according to your need. E.g.,
Click Configure button again, a message would say that OpenSSL couldn’t be found.
Could NOT find OpenSSL, try to set the path to OpenSSL root folder in the system variable OPENSSL_ROOT_DIR (missing: OPENSSL_CRYPTO_LIBRARY OPENSSL_INCLUDE_DIR)
Don’t try to set the OPENSSL_ROOT_DIR system variable, it won’t work.
As aforementioned, the OpenSSL was installed by Homebrew, and it’s located in /usr/local/opt/openssl. Let’s tell CMake where it is.
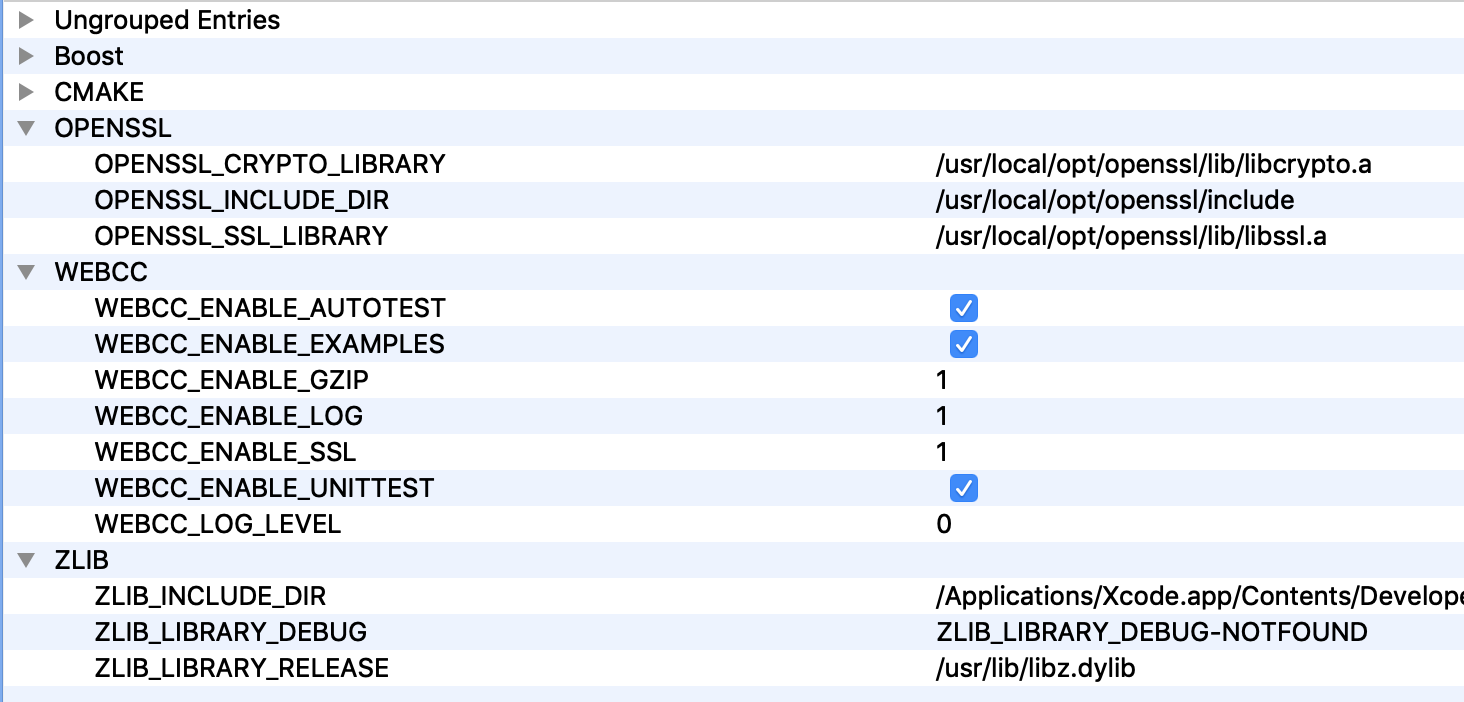
Click Configure button again. If everything is OK, click Generate button.
Open Terminal, go to the build directory, run make. E.g.,
$ cd github/webcc_build
$ make -j4